During the first two modules of our Beginners Photography Course, a lot of attention was paid to the subject of exposure and the effects of changing the shutter speed and aperture. There was also reference to the difference between setting the camera to shoot “Raw files” as opposed to “Jpegs”.
It is very easy to fall into the trap of simply adhering to rules rather than actually thinking about what they mean. So, in this tutorial I am going to look at two statements that, in one way or another, are frequently made and try to illustrate why such recommendations are often made. Fortunately, because they are interconnected, I can use the same example to deal with two:
1. Always shoot in Raw (I always want to add “unless you have a reason for shooting in Jpeg” as some reasons do exist).
2. Always expose for the highlights. Sometimes this is stated as “shooting to the right” or “shoot for the highlights and the shadows will take care of themselves”.
Personally, I have an aversion to rules that start with “Always….”. Ideally, I would prefer to see those two stated as “Think about shooting in Raw” and “Think about exposing for the highlights”. In many cases you do not have to do either. If the scene that you are shooting has a good range of tones and a moderate dynamic range and if you do not intend doing anything special with your photograph, then shooting in Jpeg and letting your camera’s matrix (or pattern) metering mode deal with exposure will produce perfectly good images. It is really only when faced with difficult conditions or when you might want to make a large print or prepare a competition entry that those “rules” become more important.
What is the main advantage of shooting in Raw? Basically, the file will contain all of the data that your camera sensor was able to capture when you pressed the shutter release. In contrast, a Jpeg is a compressed file and, typically, it might discard as much as 70% of the data your sensor captured (but it does this using clever algorithms). However, as all photo-processing is essentially data processing, the more data you retain, the more you can subsequently do with it in post-exposure processing.
Oddly, it is the same basic consideration that guides the advice to shoot for the highlights. In your image file, pure white is, essentially, an absence of data. Light sections of the image contain little data while dark sections contain a lot of data. So, in processing the image, you cannot do very much with the parts that contain very little data while you can do a great deal with the parts that contain a lot of data. So shoot so that the light parts of the image are not over-exposed (sometimes called burned-out).
Here are two examples.
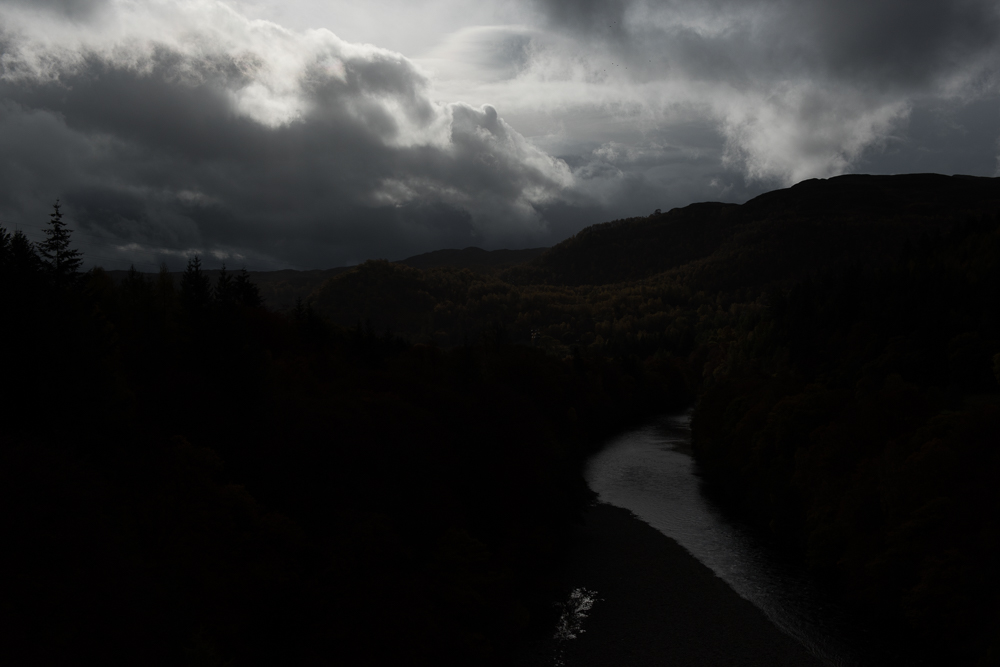
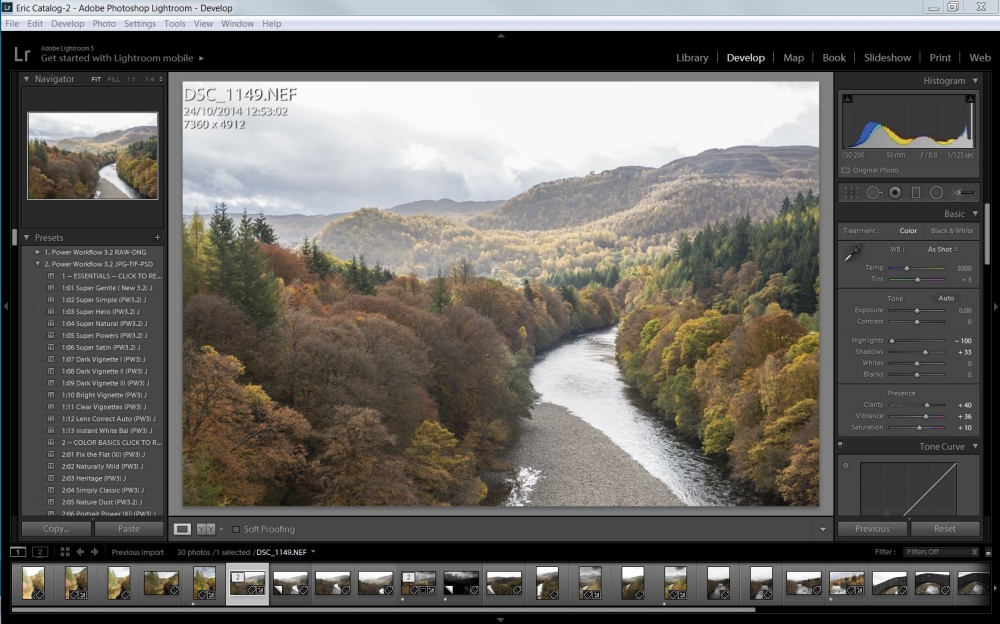
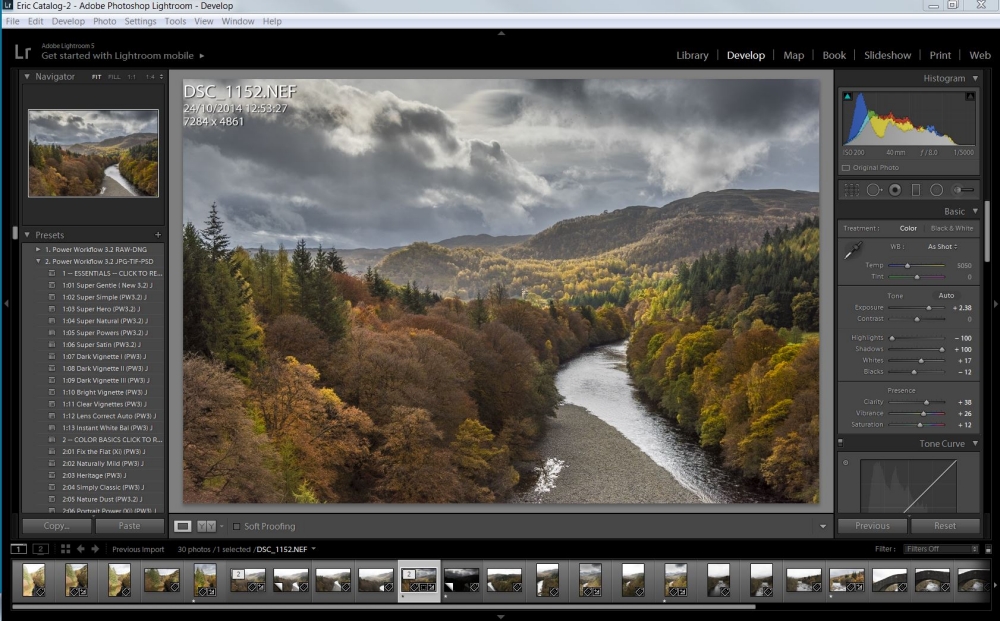
Both photographs were taken from the same place at the same time. They are looking from a bridge, down a river valley and into the sun. The sun is just off the top left of the scenes. They are not identical as I was not using a tripod and the camera was moved slightly between the exposures. Both used Aperture Priority at f/8. The first one was taken using the matrix metering mode of my camera which gave an exposure of 1/125 at f8 and ISO 200. The second one was taken using my “Highlight Priority” mode of my camera (but would have been the same if I had used spot metering and metered on a highlight in the sky) and gave an exposure of 1/5000 at f/8 and ISO 200 (yes – that 1/5000 is not a typo). That’s a difference of 5.33 stops between the two exposures.
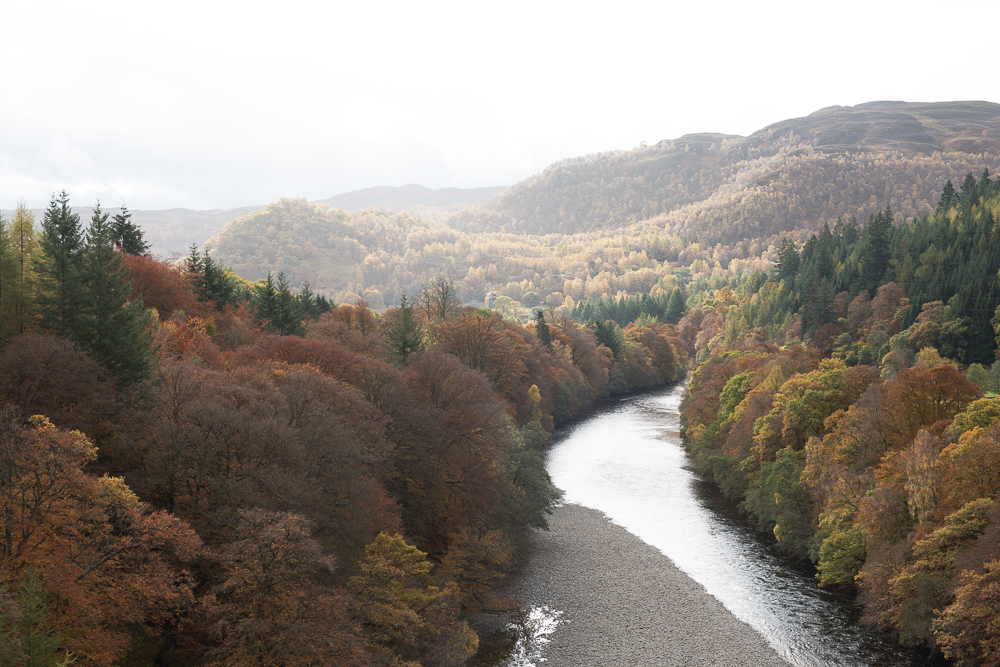
Now, you might look at Photo 1 and think, “Well, it’s not great but it is a photo. The sky is blown out but the rest looks reasonably OK for a dreich, drizzly day”.
But when you look at Photo 2 you are more likely to think, “Why the heck did he do that??”
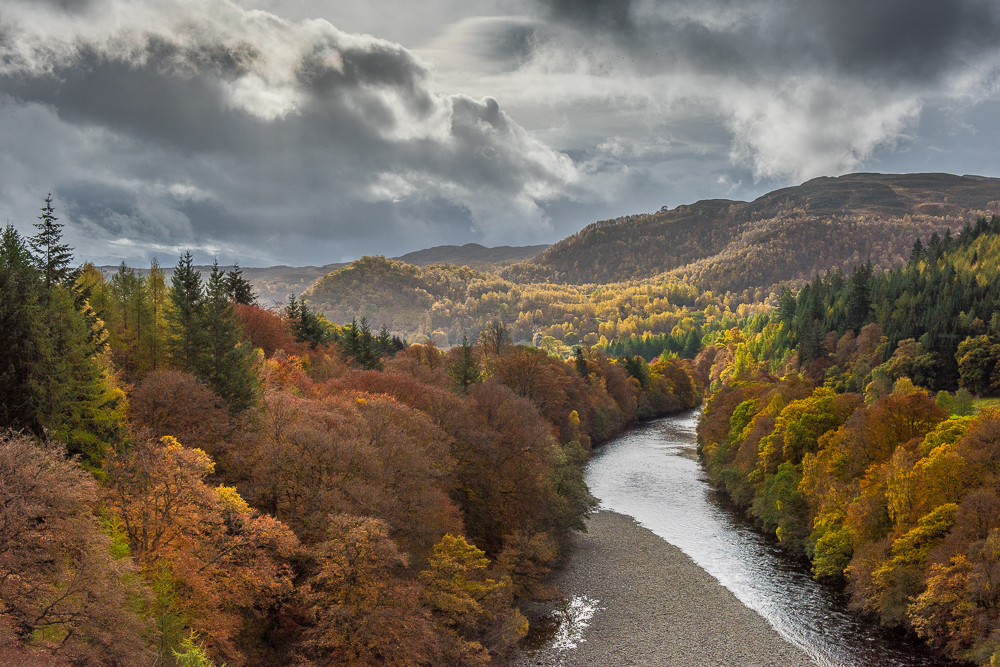
It is when I try to “rescue” those images in Lightroom (I could do the same in ACR), that the possibilities emerge. Because the highlights of Photo 1 are completely blown, there is very little I can do with it, despite it being a Raw file. But, because Photo 2 was shot in Raw and exposed for the highlights, there is a mass of data in those horrible black shadow areas that can actually be used. Photo 3 below is the best I could do from Photo 1 but I was able to produce a photograph (Photo 4) from Photo 2 that revealed much of the detail on the foreground while retaining the detail in the sky:
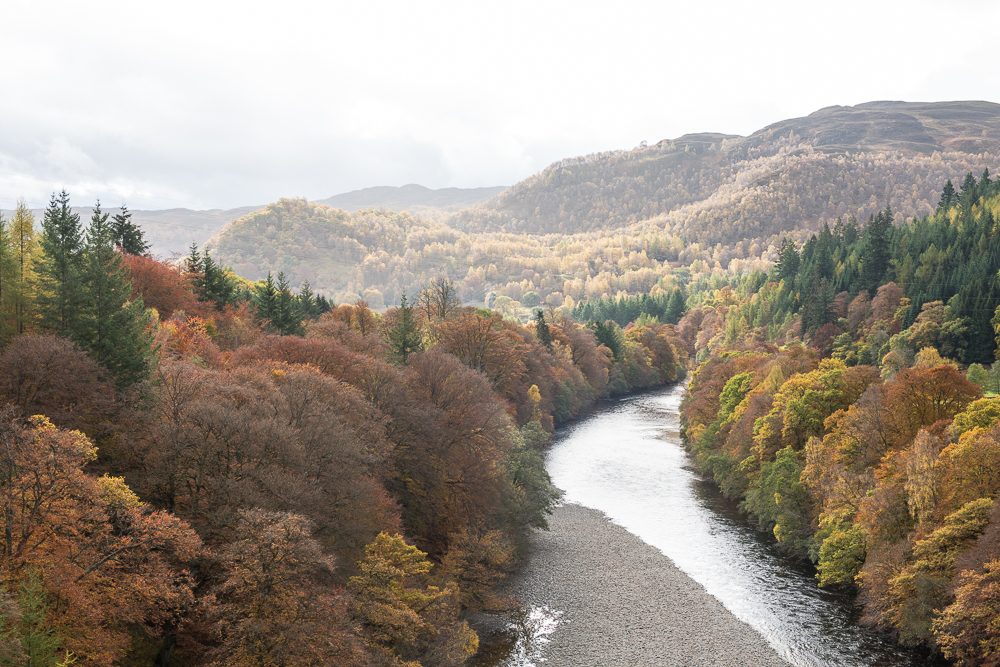
The main point to be made here is that, although Photo 1 was shot in Raw, because it was exposed on an average or matrix basis (the normal default of most cameras) it was not possible to recover the burned out highlights. Taking the Highlights slider in Lightroom (or ACR) fully to the left did recover some detail but most of what had been a fairly dramatic sky was lost. Here are the Lightroom adjustments used:
For Photo 2, however, because it was shot in Raw and was exposed for the highlights, all of the highlight detail was preserved and then, in Lightroom (or ACR) it was possible to adjust the shadow areas to restore the detail in them. Here are the Lightroom adjustments for that image:
If that photograph had been shot as a Jpeg, so much data would have been lost in the compression that recovering the deep shadows would have been impossible. There are other techniques, such as HDR or exposure blending that can be used in difficult situations like that above. But they all take time and can give uncertain results. By utilising the power of modern camera sensors and exposing for the highlights, it is frequently possible to make a single exposure and then process it to extract the maximum detail from the Raw file. It is seen more easily in a side-by-side “before and after” view:
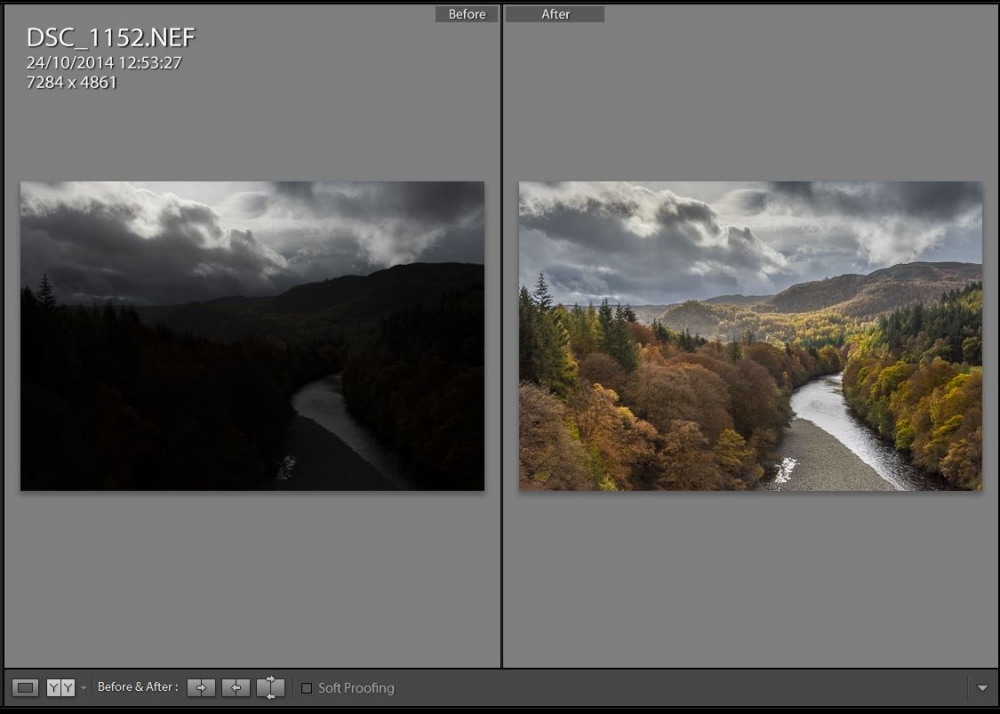
“Getting it right in camera” is often the best policy and can provide the maximum flexibility in later processing. Converting Photo 2 to Photo 4 in Lightroom or ACR takes well under 2 minutes, thereby allowing the photographer to spend more time out with the camera and less festering in front of a computer.
Eric Begbie
25 October 2014
