Arising from discussion on the Facebook page of the club’s Beginners Course, I have put together this very brief explanation of dynamic range and what is often referred to as HDR (High Dynamic Range) processing.
In nature, scenes sometimes have extremely high dynamic range – the ratio between the brightest parts and the darkest parts of the scene. The example I will use here is one such scene – a sunset scene in the mountains where the brightest highlights will be very light and the darkest shadows will be very dark. A normal digital camera sensor is simply incapable of capturing details at the extremes of such a high dynamic range.
The human eye actually has a much poorer ability to see a high dynamic range scene than our camera sensors do but, because the eye can accommodate very rapidly between light and dark subjects and because our brains process the information from the eye very cleverly, we can actually look at a high dynamic range scene and believe that we can see detail in very dark shadows and also detail in very bright highlights. Producing that range in a photograph is more difficult – although it is becoming easier all the time as camera manufacturers give us better and better sensors and software companies give us better and better processing tools.
The examples on this page were processed from the Raw files taken by a 2012 camera in 2014 software. (I use Adobe Photoshop Lightroom but the latest versions of Adobe Camera Raw have the same capabilities.)
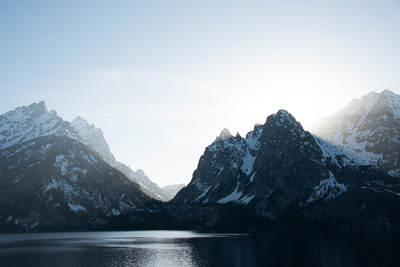
Here is a photograph taken in the mountains just as the sun sets behind one of the peaks. This first version is what the camera gave as a “correctly exposed” image and it is unprocessed (or I should say “unmanipulated” as all Raw files have to be processed before they can be viewed.):
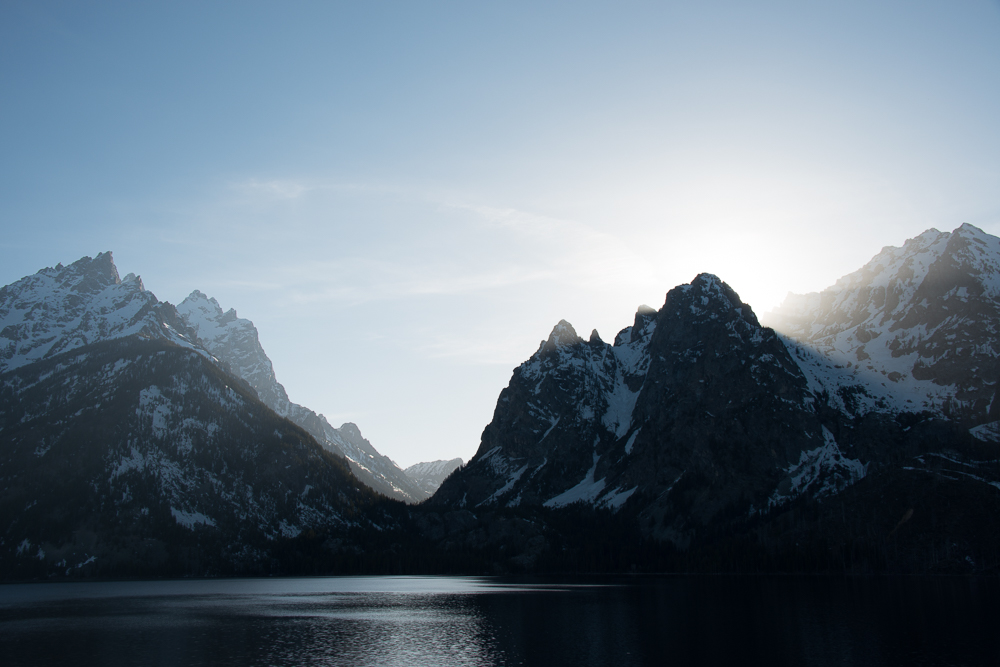
As can be seen, there is no detail at all in the blown highlights and none either in the blocked shadow areas. In other words, a pretty unimpressive photograph of what was a glorious scene!
The reason for this can be easily seen by looking at the histogram in Lightroom or ACR (or, I suspect, any other decent editing package):
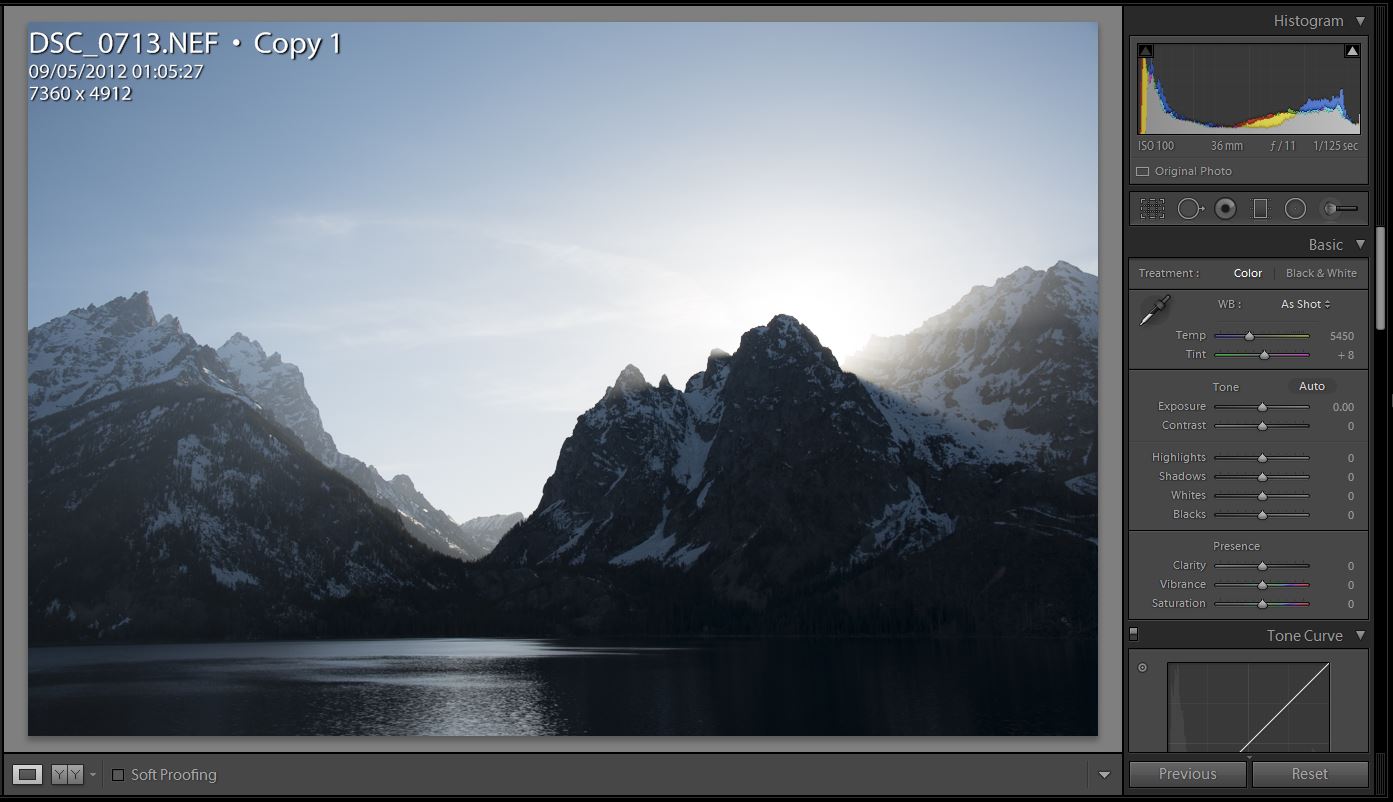
As can be seen, both ends of the histogram are “off the scale”. The left side of the histogram represents the shadow areas and the right side represents the highlight areas. Ideally, we want the full range of tones in the image to be contained within those limits.
If only a single exposure had been made and we wanted to “rescue” it, then – because it was shot as a Raw file – it is possible to reveal a bit more detail in both the shadow and highlight areas. In the past, a common technique would be to make three versions of the image in the raw processor – one “as shot”, one a stop or two underexposed and one a stop or two overexposed. If those three files were then blended in HDR software, the resultant image should show as much detail as the camera sensor was able to capture.
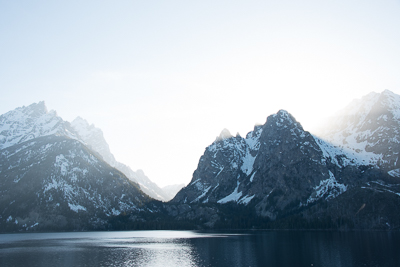
Happily, that somewhat convoluted process is no longer necessary. Simply adjusting the “Highlights” and “Shadows” sliders in Lightroom or ACR will reveal as much detail as the camera sensor captured. The following example shows the original image processed to the maximum extent of the highlights and shadows adjustments:
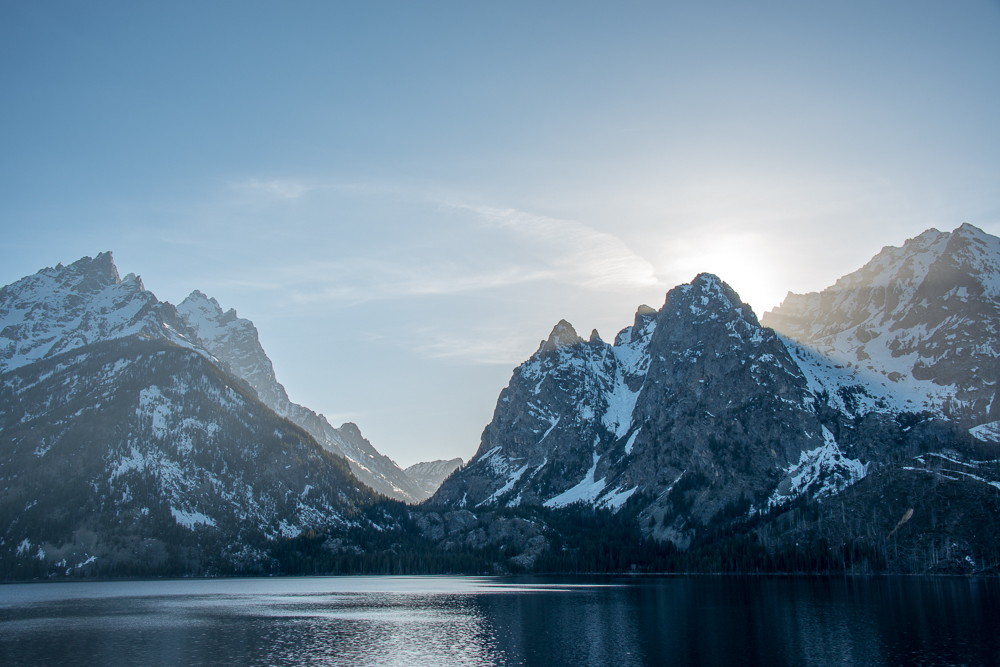
As can be seen, it is a big improvement on the original but there are still blown highlights and, more obviously, blocked shadows. There is just no way of seeing the detail in those areas because, quite simply, the camera was unable to record it.
High Dynamic Range processing was developed to deal with situations like this. Such processing allows the photographer to take several exposures, bracketed around the “correct exposure” and to then combine them in special software. I use Nik’s HDR EfexPro2 but some versions of Photoshop have a “Blend to HDR” function and another independent package, Photomatix, is favoured by some club members. The principal problem with this technique is that it is pretty much restricted to use on fairly static subjects.
Happily, when I took this photograph I recognised from the histogram on the camera that I was not going to be able to capture both the highlights and the shadows in a single exposure – so I made five exposures at one-stop intervals. One was underexposed by 2 stops, one underexposed by 1 stop, one at the “correct” exposure, one overexposed by 1 stop and one overexposed by 2 stops. That simulated extending the dynamic range of my sensor by 4 stops.
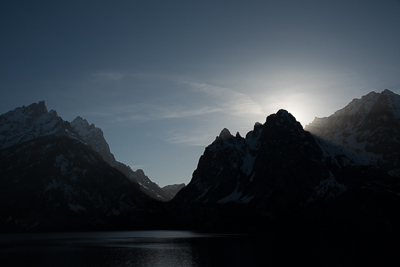


I then opened those five image files in HDR EfexPro2 (which can be done automatically from within Lightroom but can be done either internally or externally from other editing packages) and blended them to produce a single HDR image:

For the purpose of illustration, I have overdone the HDR processing slightly – as evidenced by the “grunginess” of the image, especially as shown by the haloes around the mountains. With most HDR software, however, you can adjust many of the blending parameters to get the overall effect that pleases you most. The HDR-ed version is certainly closer to what my eyes saw when looking at that scene.
Eric Begbie
22 October 2014
